I am really happy to finally get to manage my first tutorial. I actually wanted to do this much earlier, but was kept busy with other things. But now it's here, and i will try to update it frequently.
The bad news though, is that I work with my Photoshop CS in German, so i am not sure if it will recognize the english word for specific tools. For this reason, I have highlighted (transparent turquoise) the tools I have used. Please click on the pictures to enlarge them for a better view.
This is a tutorial for people who are already familiar with using Photoshop or already have the basic skills for it, but also for people who are just curious and interested.
First of all, I am using the Robinwood Templates for my system clothing design in Second Life, which you can get
here .
The texture tutorial below is developed on a 512x512 pixel texture, as it doesn't have many philigran cuts or accessories. However, I do recommend that you download the 1024x1024 pixel templates also if you want to work on more complicated cuts or details.
So lets get started:
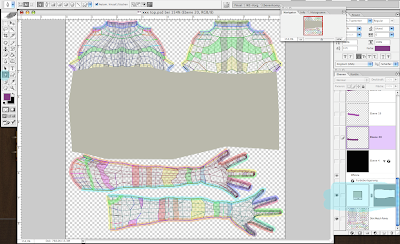
The very first thing I do is to use the pen tool to draw my cut on the template. This tool is very handy to outline shapes in a very clear and sober way. You will find a youtube tutorial on how to use this pen tool in the sidebar links.
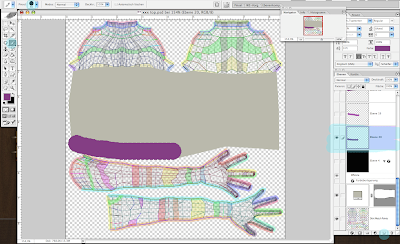
Afterwards I added a new layer and chose the pencil tool to draw the lines of the texture I had in mind for this dress.
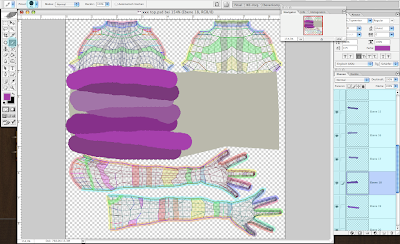
As I had a "wrapped around the body" shirt in mind, I opened a new layer for each stroke, so as to not have the edges of the lines going over each other, and to layer each stroke under the other one. At the end I just combined all stripe layers into one layer.
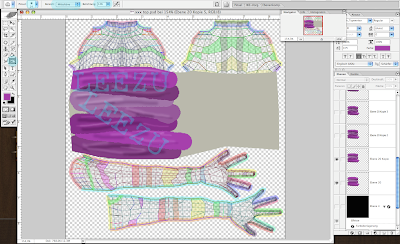
The next step was to add the wrinkles to the "garment" by using the Dodge and Burn Tool. You can experiment with the thickness of this tool or highlights, midtones, darktones and the strength of the result. For drawing the wrinkles I stayed in the midtones, but changed my brushsize in between. I always find it hard to discover the right wrinkles and draw them right. So its always better to take time to experiment with this.
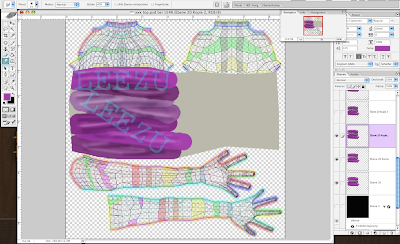
Once I was satisfied with the rough draft of the wrinkles, I used the smudge tool to make all the lines smoother and give it a bit more of a homogenous (less distressed) feeling.
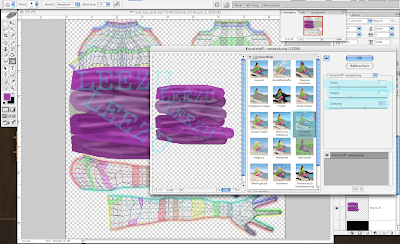
A trick now is to open the filters menu in the main menu above and use the Plastic Wrap Filter and to adjust the sliders to your needs.
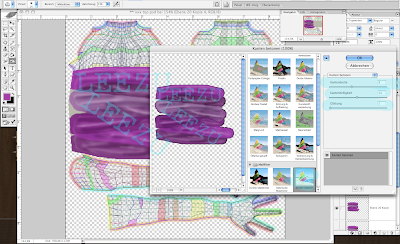
Then open the filters menu again to add the Highlight Edges Filter. This gives the edges a deeper, 3 dimensional look. Not much but enough to make a difference.
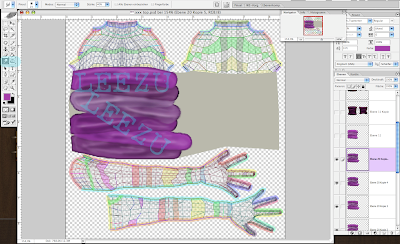
After this, I went back to the smudge tool to paint everything a bit smoother and used the dodge and burn tool again to finalize the wrinkles.
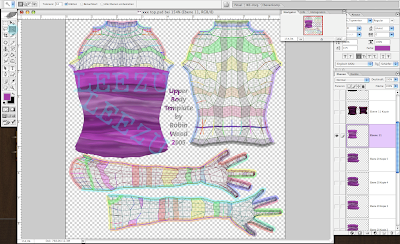
After adjusting the main color, I cut out the sides to have the right look on the shape and borders.
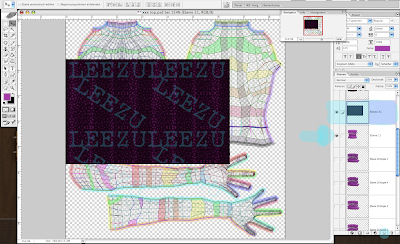
Then I opened a texture I had already prepared for the Berlin skirts and copied and pasted it into my top template...
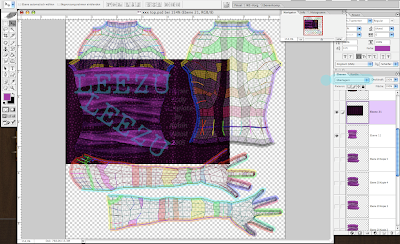
... and set the whole layer via drop down menu to overlay.
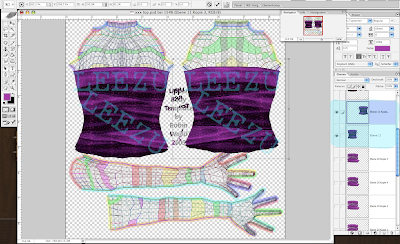
I cut out the unnecessary part and combined both layers into one. I copied the texture and mirrored it horizontal for the back side. Of course this is silly if you want to have the back look different than the front, but for this draped shape look it works. But dont forget to mirror it before you adjust it. It's Important now to resize the back side a bit to have matching sides in Second Life. This can be tricky and cost some uploads till you get it right but sides should match in my opinion or it looks unfinished.
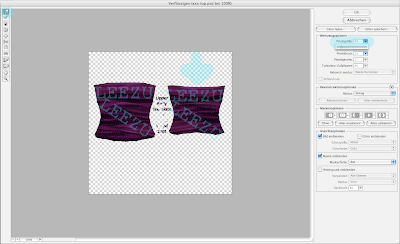
Then i adjusted the colors again to fit it to my original idea. Since I wanted the top back part to come down a bit, I opened the liquify window (also under Filter Main menu) and moved the top back part a bit lower till it fit.
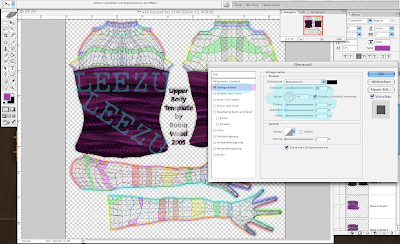
Now I double the layer and select the layer below (not the doubled one) and open the (layerstyle) menu through double clicking the layer to add shadow to the top. This makes the system clothes look a bit more natural on the Av and it doesn't look like it's painted on.
There are other ways to add shadows, especially for complicated cuts or if the edges of the textures and shadows don't fit together, but that would be another tutorial. For this simple cut it's enough to go through this menu.
After I adjusted the shadow through the sliders to my satisfaction I opened a new layer (empty) underneath the layer with the shadowed texture and combined both. The effect of this step is that the shadow is now attached to the texture and I can erase parts of it when i see inworld that the edges don't fit to each other. I couldnt do that if the filter was still active through the (layerstyle menu).
Also I doubled the layer to avoid having the shadow attached on my origianl texture because later if I change colors I would also change the color of the shadow, which I wouldn't want. So shadows please should always be as an extra layer.
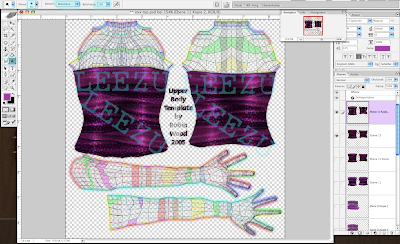
To finalize the garment I returned to the dodge and burn tool and highlighted and darkened both parts with a thicker brushstyle.
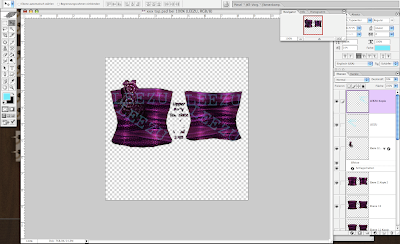
To complete everything regarding the final dress style i added an accessory to it.
Now uncheck all other layers (exept the original and the shadow one) and save this file as a png file.
(in earlier times it was tga which was a bit more complicated to finalize the shadow effect to, and err since when do they have the png choice actually? i just discoverd it a few weeks ago but maybe i am blind^^)
And here is the result of the finished dress inworld:

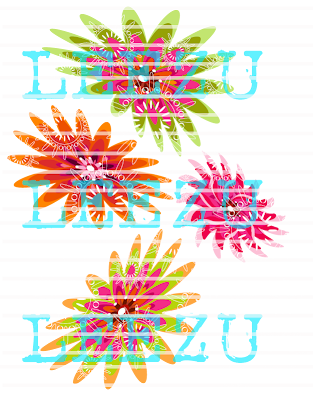
For the lighter flower overlayers seen on the sculpted prims I used a texture which i prepared weeks ago in Illustrator CS as a vector graphic to use for an upcomming release and overlayed it on the basic texture in Photoshop.
One thing while working on this texture is of course always going back and forth in Second Life and Photoshop to adjust everything right. A tip to save all the upload money is to download the Mono grid and work there. Its a beta grid which is not connected to the main Second Life grid and therefore Linden Lab adjusted the account balance to already 40k I think (which you of course cant transfer...lol) but you can pay the uploads from this money and adjust everything on the monogrid and later you just have to log into the main viewer and upload the final texture.
If you have any questions please don't hesitate to ask them via the comments and i will try to answer them. Also of course I am always open for tips and tricks or any input on what kind of tutorial you would like to see. So please comment as I check this site frequently.
Sidenote: I reserve the right to delete any rude or unrelated comments.
Love and Respect,
LeeZu


