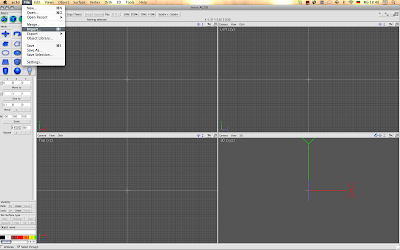
For my sculpties I use AC3D. Its a very simple but effective 3D program and you don't need to have Blender or Maya skills to handle it. You can download a trial version here www.inivis.com.
After the download open the program and you will see four different sections which will display your sculpt from each angle.
What we do first is to Import one of the Second Life prims, that are included in the download. You will find it in the folder /Applications/ac3d/Models/Second Life. You will find there: Cylinder, Sphere and Subdcube. What we need now is the Subdcube.
Here you can see it after the import. Each section displays a different side of the cube. I use only one window to work with. And that would be the one on the left bottom. To get into the full screen modus, click the small icon on the upper left of the window. (see orange arrows) You can switch back any time by pushing the space bar.
This should be your screen afterwards. You can see that there are two sides on the top and the bottom that have in the center 4 points (Vertices). This should stay on the top and bottom (don't rotate) as we will need the plain sides to display the texture right. You can zoom via Command key (mac) and Ctrl key (PC) and rotate your view by also pushing the alt key. You need to handle these two keys to be able to move fast in the program and check all sides of the cube.
Resize the cube now by activating the two buttons on the left upper corner (see orange arrows) and click the resize point in the center and drag it with your mouse to the left. (dont resize it from the top to the bottom!)
Now activate the last of the four buttons on the left upper side of your screen (see orange arrow) and drag a square over half of the cube to activate the Vertices=blue small points.
Turn your view to see the side of the cube and then click the Rotate button on the upper left side (see orange arrow) and rotate the upper half of the cube a bit to the left. If you make mistakes you can go back with the Undo option in the Menu at any time: Edit->Undo. Keep the Vertices activated. If you lose them just drag a square again over them with the mouse.
Now activate the Move button in the upper left corner (see orange arrow) and move the upper half of the cube a bit to the left to equate the resized sides.
Turn your view now to see the front side of the cube and drag a square only around the Vertices seen above.
Turn your view again and click and move the activated area to the left, to resize it only to the left side.
Do the same now with the lower Vertices. As you can see, here it develops slowly into a pillow.
Click now only one Vertice to activate it and move it a bit inside the cube with the moving arrows.
Now again drag a square over above shown Vertices and size them a bit to the right (or front) to refine the edge on the side.
Now activate the upper right corner of the cube (drag a square) and resize it on the sides to make the side smaller.
Activate the three Vertices on the left side of the cube (dont drag a square here or you will also activate the Vertices on the back of the cube) and move them a bit inside the cube.
Activate the left upper corner of the cube by dragging a square over them and move them up a bit.
Don't forget to save your project.
Export the Pillow now as a Second Life Sculpted Prim. This will give out a rainbow texture in the TGA format. Export here means save it on your hard drive wherever you want it.
Sign into Second Life and rezz a cube (or sphere) and upload the tga rainbow file. Go to the Object tab and click the drop down menu and click on Sculpted.
Drag and drop your texture in the building window. Underneath you will see a drop down menu starting with Sphere. This displays the stitching type of the sculptie. It depends on the sculpt which stitching type you use. But for this pillow we will use Sphere.
Et Voila! You can texture the pillows now as you like. To specify the pillows with the appropriate shadow and light settings you can use the abc template, which you can download below (right click and save on your hardrive):
Texture your pillow with this template to see the guidelines and open this template in your photo program (whichever you use) not necessarily Photoshop and work your texture through the guidelines.
Another possibility is of course to texture it in Photoshop CS4, which has the ability to import 3D objects and paint directly on them. But that would be another tutorial.
Please experiment as much as you can with the AC3D program. The more you do, the more you will understand it.
Happy sculpting!
Love and Peace
LeeZu


Awesome!!! Havent used this program yet, seems like a piece of cake, thanks a lot for the tip :)
ReplyDeleteThis is awesome! Thank you.
ReplyDeleteIt never ceases to amaze me the number of extremely talented individuals who make Second Life a rich and fascinating environment to be in. Thanks for the post!
ReplyDelete